


Objective
This guide explains how to organise a tool belt for bricklaying and trade work, choose suitable pouches and holders, and keep your equipment secure and comfortable throughout the working day.
Key Takeaways
- Keep your most-used bricklaying tools within easy reach and less-used equipment in your tool bag.
- Make sure your Bricklayer Tool Belt fits securely over your workwear.
- Give your trowel, tape measure, hammer and smaller accessories their own storage positions.
- Choose a practical setup that suits the job rather than carrying every tool you own.
- Check your belt, fastenings and tool holders before starting work.
Introduction
Have you ever put your trowel down while laying bricks, only to spend the next few minutes looking for it? It’s a familiar frustration on building sites. A well-organised Tool Belt helps you keep essential equipment close at hand, so you can focus on laying bricks, measuring walls and completing each task.
Whether you’re building a garden wall, working on a housing development or carrying out repairs, your Bricklayer Tool Belt should make everyday tasks easier without getting in your way.
The Health and Safety Executive (HSE) identifies repetitive work, awkward postures and manual handling as potential causes of musculoskeletal problems in construction. Its guidance on manual handling in construction explains why reducing unnecessary reaching, twisting and carrying matters. A sensible tool belt arrangement can support better working habits, although it does not remove the physical risks associated with bricklaying.
Table of Contents
- Why Tool Belt Organisation Matters
- What to Keep in a Bricklayer Tool Belt
- How to Organise Your Tool Belt Step by Step
- Choosing the Right Tool Belts and Pouches
- Tool Belt Safety, Comfort and Maintenance
- Common Tool Belt Organisation Mistakes
- Frequently Asked Questions
1. Why Tool Belt Organisation Matters
On a busy building site, constantly putting tools down and picking them up again can slow your progress. A properly arranged tool belt gives your trowel, tape measure and other everyday essentials a designated place, making them easier to find when needed.
The aim isn’t to carry more tools. It’s to arrange the ones you use regularly so you can reach them without searching through pockets or walking back to your tool bag.
Make Your Everyday Work More Practical
Think about a typical shift. You might use your trowel repeatedly, reach for a tape measure when checking dimensions, and need a pencil for marking out. These tools should be easy to access without forcing you to twist or stretch.
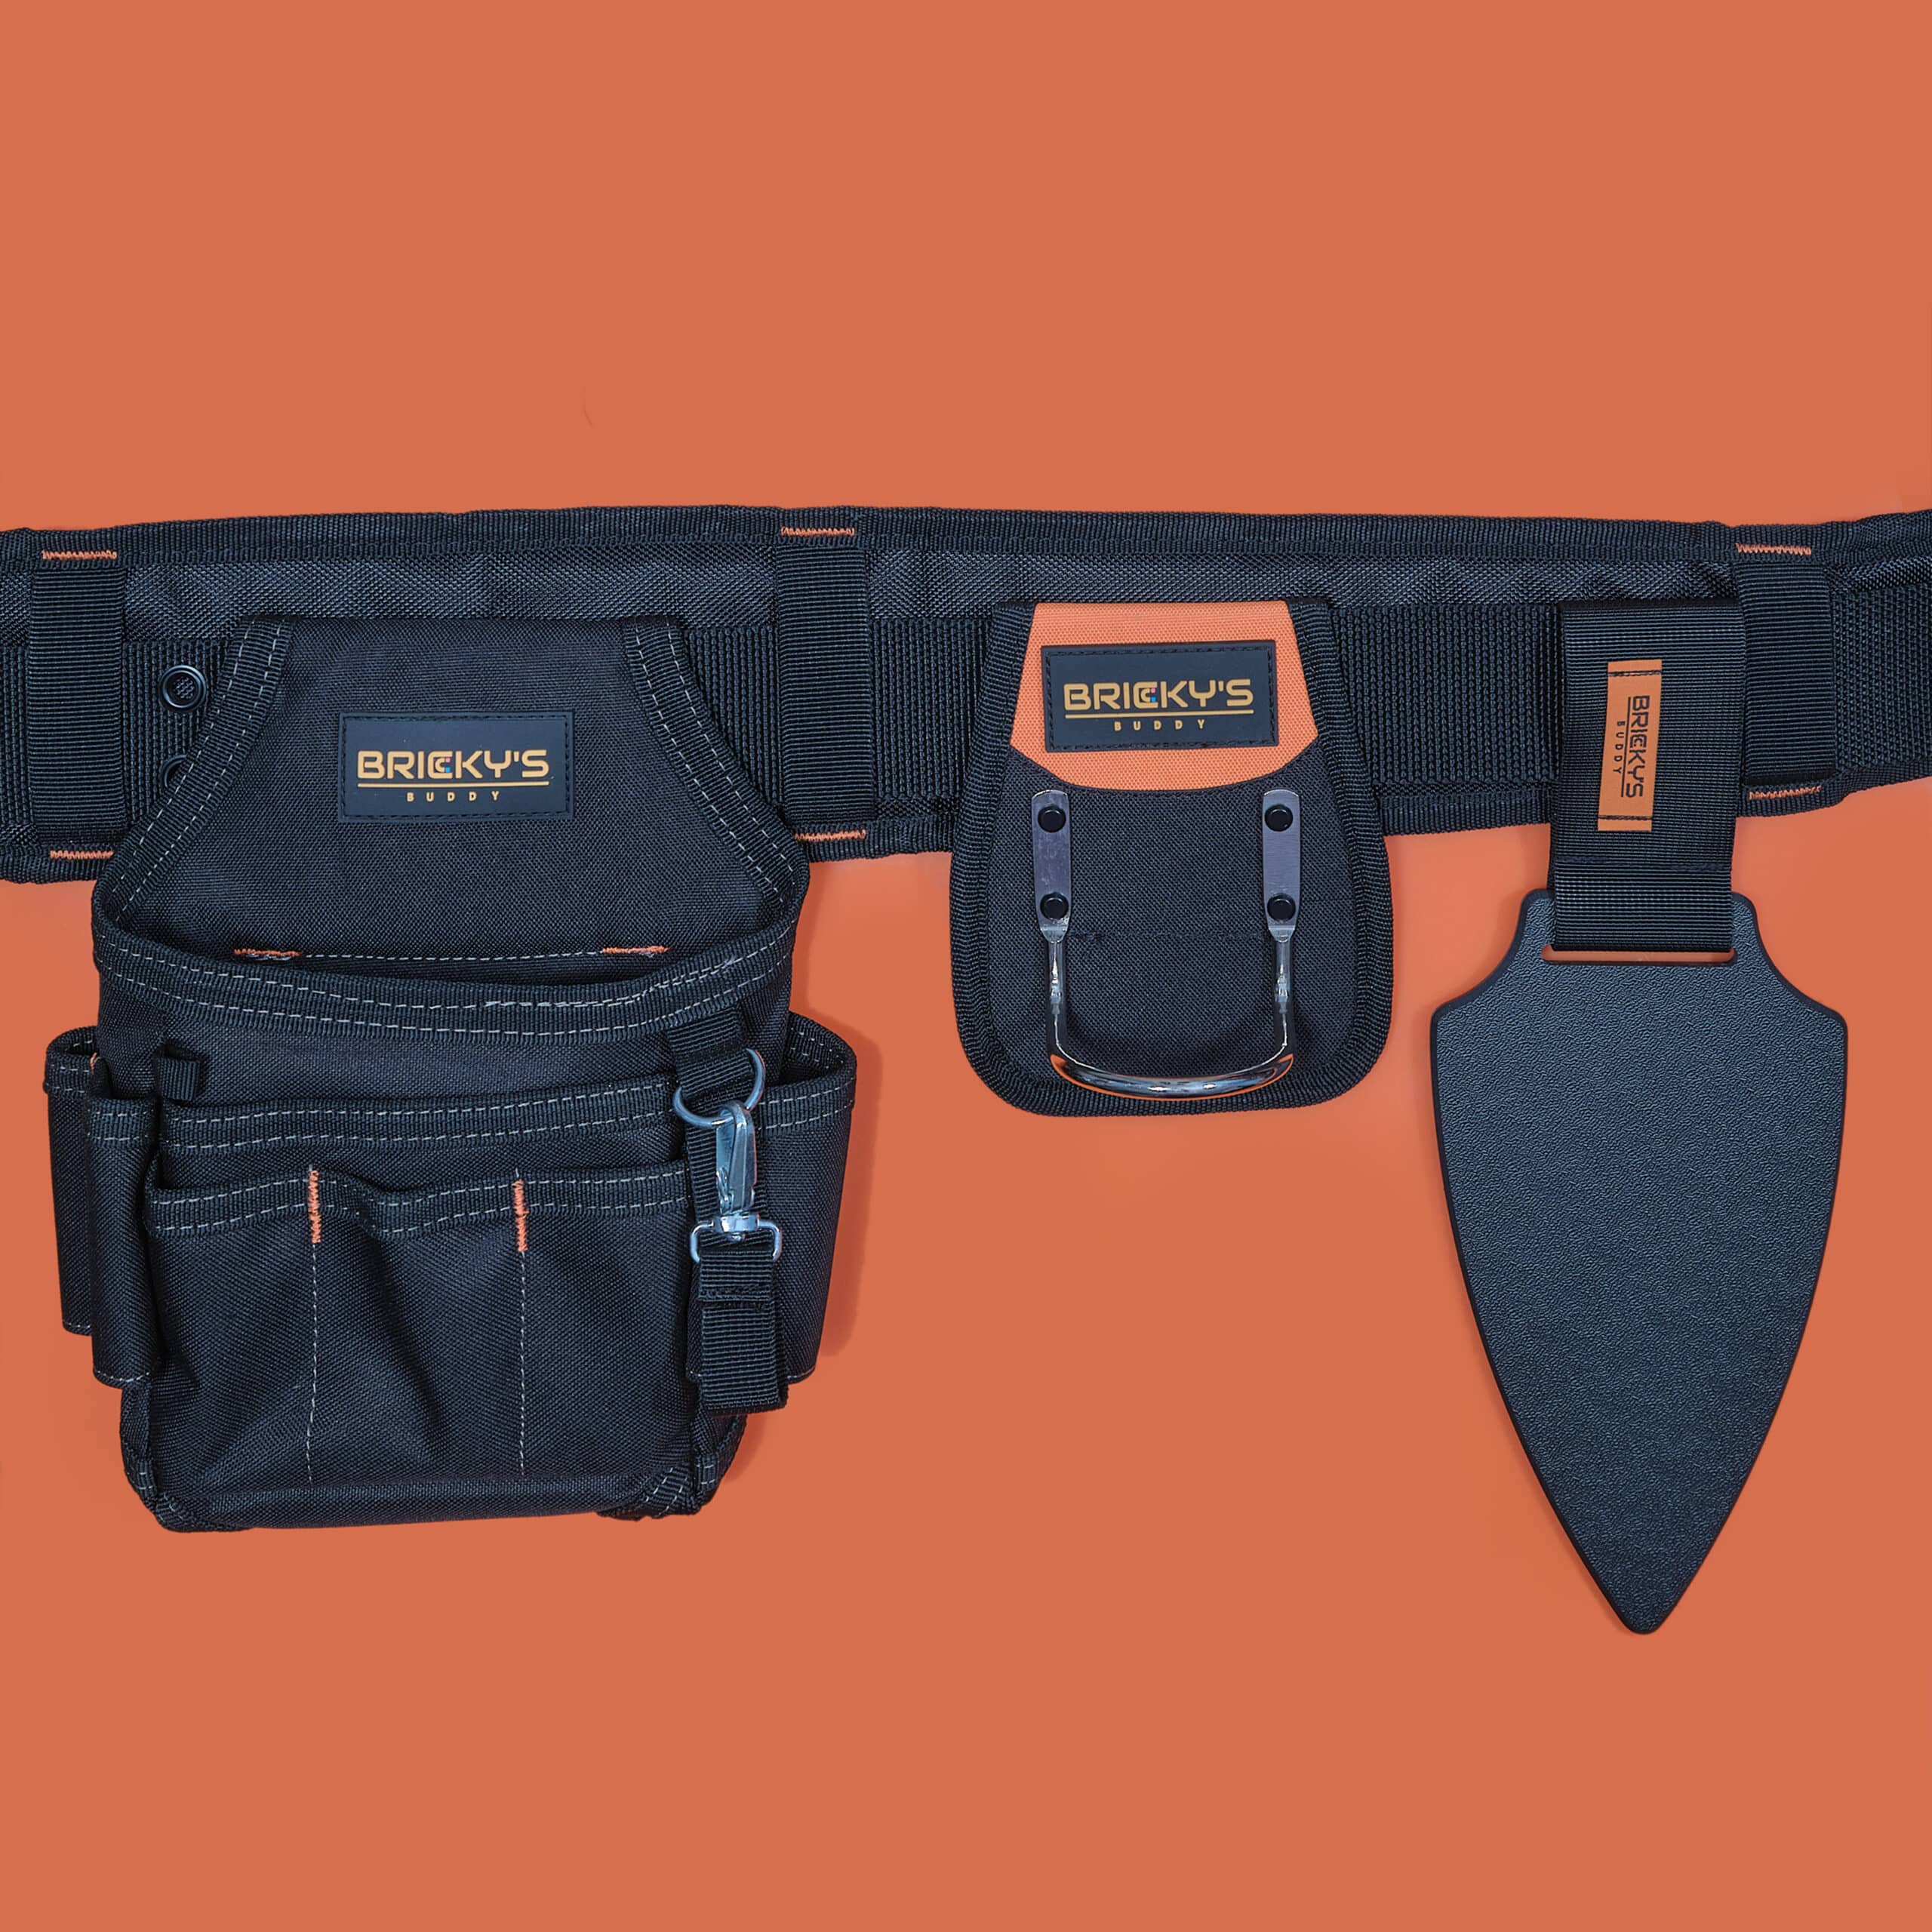
A Bricky’s Buddy Large Magnetic Trowel Holder provides a dedicated place for a compatible trowel between tasks. Choose the holder that suits your trowel, and check that it retains the tool securely before use.
2. What to Keep in a Bricklayer Tool Belt
Your Tool Belt for Bricklayers should suit the work you do rather than carry every tool you own. The right setup depends on the task, your working method and the belt’s capacity.
For most bricklaying jobs, start with these practical essentials:
- Brick trowel: Use a suitable holder so you have a consistent place to put it between tasks.
- Tape measure: Keep a holder to easily reach for it when checking measurements.
- Pencil: Keep it in a small pouch or compartment.
- Hammer: If you’ll need it for the task at hand, use an appropriate hammer holder.
- Line pins and small accessories: Keep these together in a pouch so they don’t become mixed up with other equipment.
Before adding anything else, ask yourself whether you’ll use it regularly during the task. If not, leave it in your tool bag until needed.
Bricky’s Buddy offers magnetic trowel holders in Mini and Large options. Compare their intended uses and check compatibility with your trowel before choosing one.
3. How to Organise Your Tool Belt Step by Step
There’s no single belt arrangement that works for every bricklayer. Your dominant hand, the tools you carry and the type of brickwork all influence the best setup.
Step 1: Lay Out Your Essential Tools
Place the tools you expect to use on a clean surface. Remove duplicates and anything you will not need for that task.
For example, if you’re laying a straightforward run of brickwork, you may only need your trowel, tape measure, pencil and a few smaller accessories close by. Keep larger equipment in your tool bag until required.
Step 2: Give Every Tool a Fixed Position
Arrange tools according to how often you reach for them. Put smaller accessories in suitable pockets and position the holders where they’re comfortable to access.
If you’re right-handed, try placing your trowel holder on the side that feels natural when reaching for it. Position your tape measure so you can retrieve it without stretching across your body. Left-handed bricklayers can reverse the arrangement where that feels more comfortable.
The best layout is the one that works with your normal movements. Try it with your usual workwear before settling on the final positions.
Step 3: Balance the Load and Test the Fit
Fasten your belt securely and check that it sits comfortably over your workwear. Walk, bend and reach carefully to check whether any tool catches on your clothing or shifts out of place.
If the belt shifts or makes bending awkward, adjust the fit or reposition the attachments before starting work. Remove tools you don’t need rather than accepting unnecessary weight.
4. Choosing the Right Tool Belts and Pouches
A good bricklaying belt setup doesn’t need dozens of attachments. What matters is choosing a belt that fits properly and holders that suit the tools you actually use.
Choose a Suitable Belt
A Webbing Belt offers a simple base for compatible holders and pouches. Bricky’s Buddy lists an adjustable webbing belt made from polypropylene webbing, with a 50mm width and locking clip fastening.
If you prefer additional padding around your waist, the Wide Padded Comfort Belt offers a wider, foam-padded alternative. Consider the weight of your tools, your usual workwear and how the belt feels when bending or moving around site.
Add Useful Pouches and Holders
Rather than filling your belt with unnecessary accessories, choose holders that solve specific problems. A tool belt and pouch setup can combine dedicated storage for your hammer, tape measure and smaller equipment.
If you’re building a complete setup from scratch, Bricky’s Buddy’s Ultimate Belt Package includes a padded belt, a choice of mini or large magnetic trowel holder, a tool pouch, a hammer holder and a tape holder. The listed padded belt fits waist sizes from 32 to 46 inches.

5. Tool Belt Safety, Comfort and Maintenance
Your belt gets exposed to mortar, dust, changing weather and everyday knocks on site. A quick inspection before work helps you spot worn attachments or damaged fastenings before they become a problem.
HSE recommends construction workers assess manual-handling risks and minimise avoidable physical strain.
Before each shift:
- Check the belt fastening, stitching and holders for damage.
- Secure sharp tools and loose accessories properly.
- Check that magnetic holders are clean and that compatible tools remain securely attached.
- Make sure the belt does not interfere with bending, walking or other movements.
- Clean away mortar and debris as appropriate.
When working on scaffolding or at height, follow your site’s risk assessment and dropped-object prevention procedures. A belt holder alone should not be treated as a certified tool-tethering system.
6. Common Tool Belt Organisation Mistakes
Even an expensive tool belt can become frustrating if it’s overloaded or poorly arranged. Watch out for these common mistakes:
- Overloading your belt: Carrying too many tools adds unnecessary weight. Keep spare equipment in your main tool bag.
- Using unsuitable pouches: Loose tools can be difficult to retrieve and may fall out. Match each holder to the equipment it is designed to carry.
- Ignoring belt position: A belt that sits too low or shifts when bending can interfere with movement. Adjust the fit before starting work.
- Forgetting regular checks: Mortar, dirt and everyday wear can affect holders and fastenings. Inspect them regularly.
The aim is to build a tool belt arrangement that works with your routine, not against it.
A Better Tool Belt Starts with a Simple Setup
A well-organised tool belt keeps the essentials where you need them, whether you’re laying bricks, checking measurements or moving between jobs on site. Choose a comfortable belt, position your tools to suit your working habits and make adjustments as your tasks change.
Explore Bricky’s Buddy’s Tool Belts and Pouches to find suitable belts, magnetic trowel holders and practical accessories for your next job.
Frequently Asked Questions
1. What should a bricklayer carry in a tool belt?
A bricklayer will typically carry frequently used tools such as a trowel, tape measure, pencil and, where needed, a hammer. Smaller accessories can go into suitable pouches, while heavier or less frequently used equipment can stay in a separate tool bag.
2. How do you organise a tool belt for bricklaying?
Start with your essential tools, give each one a fixed position and keep frequently used items accessible. Check that the belt fits securely and does not restrict movement.
3. Are tool belts and pouches worth buying?
Tool belts and pouches can make everyday site work more convenient by giving frequently used equipment a dedicated place. Their usefulness depends on choosing a comfortable belt and holders suited to your particular trade.
4. How can you make a tool belt more comfortable?
Choose an adjustable belt that fits securely over your workwear. Distribute tools sensibly, avoid carrying unnecessary weight and reposition attachments that dig into your waist or restrict movement.
5. Is a magnetic trowel holder useful for bricklayers?
Yes, a magnetic trowel holder can be useful for keeping a compatible trowel close at hand between tasks. Bricky’s Buddy offers Mini and Large Magnetic Trowel Holders for different trowel sizes. Always check compatibility and secure retention before use.